
4 easy steps to exporting stems in Ableton Live for Professional Online Mixing and Mastering Services.
- Go to the File
- Select Export Audio/Video
- Follow settings to picture on the right.
- Then hit Export.
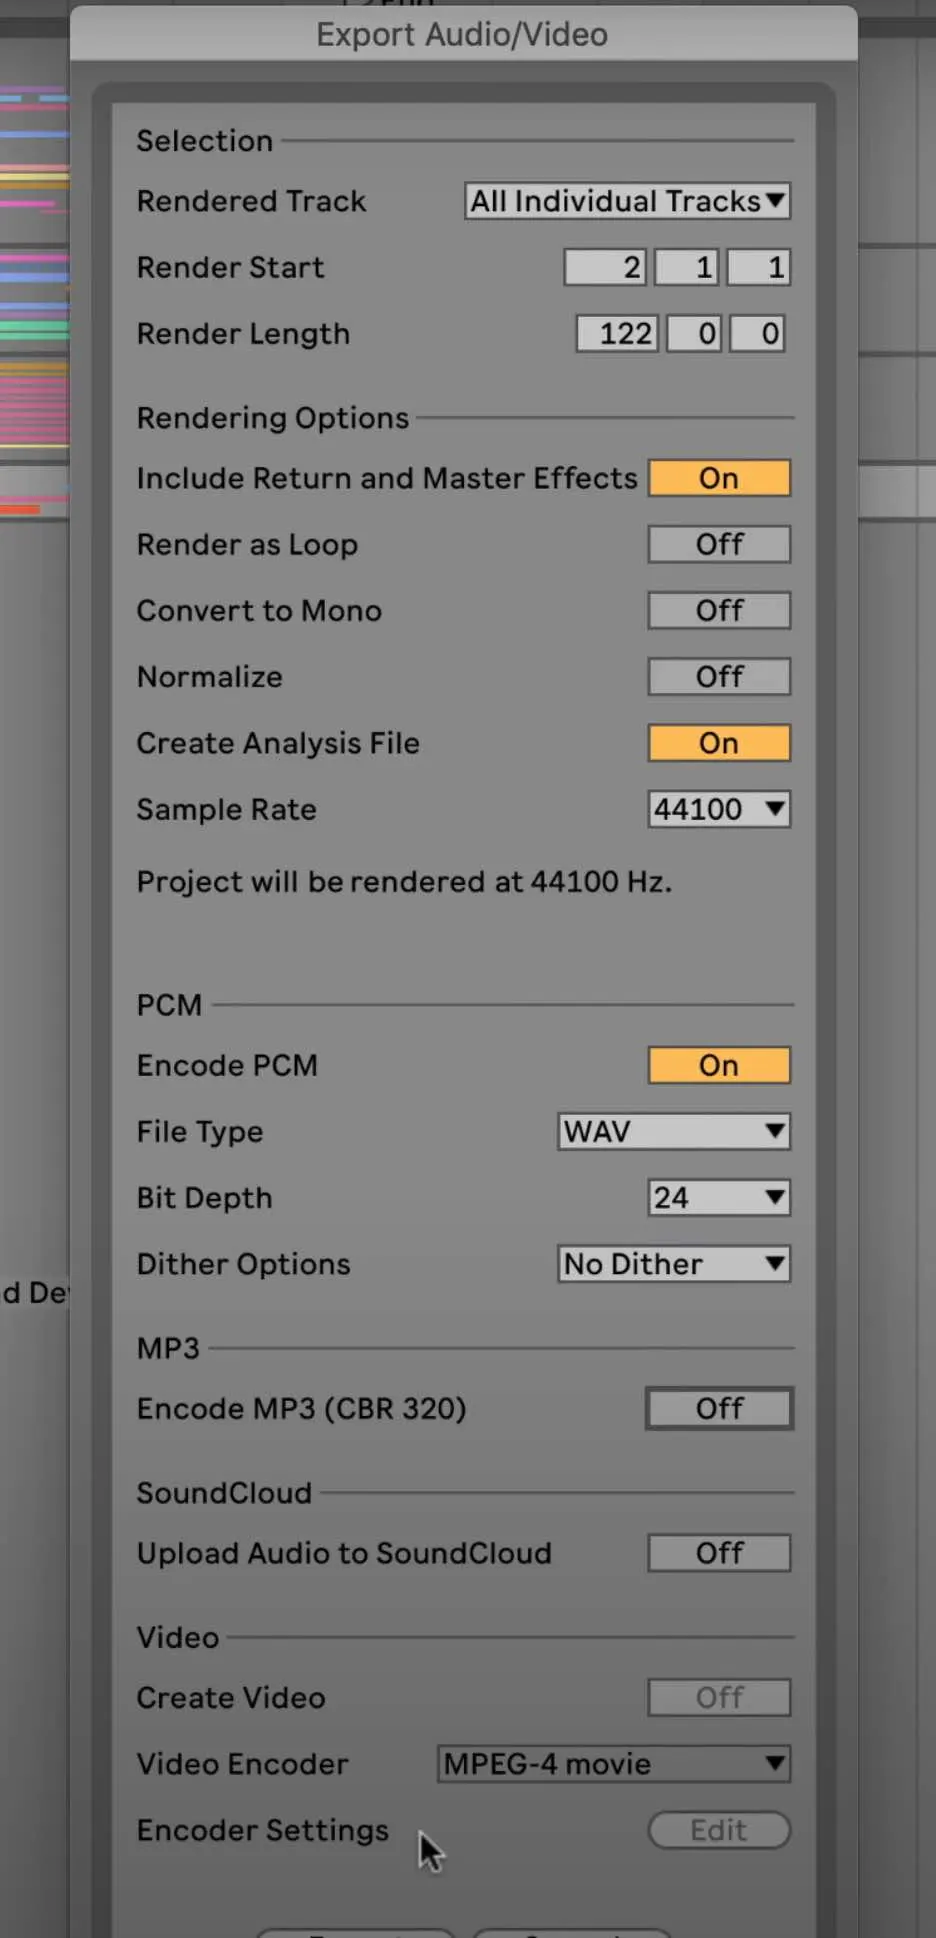
After exporting your stems you can then upload your zip file here at Audiomixingmastering.com/upload for professional online mixing and mastering services for an affordable rate.
Listen to our before and after samples here at Audiomixingmastering.com/samples to hear the difference for yourself.
One Step From a Pro Mix
Ableton's export takes care of the technical side; what mixing services care about is consistency, every stem from bar one, dry where possible, with your rough mix included for direction.
Stem Export Mistakes Worth Avoiding
Export every stem from the exact same start point, usually bar one, so they line up instantly when they are imported for mixing. Bounce them dry unless an effect is part of the sound itself, since reverb and heavy compression printed into a stem cannot be removed later. Match the sample rate and bit depth of your session, and leave a little headroom below clipping. Name each file clearly by instrument so nobody has to guess what they are opening.
If you are unsure whether to print an effect, export two versions of that track, one dry and one wet, and let the mixing engineer choose. It costs you nothing but a few minutes and it keeps every creative option on the table when your song reaches the final mix.